Blog
-
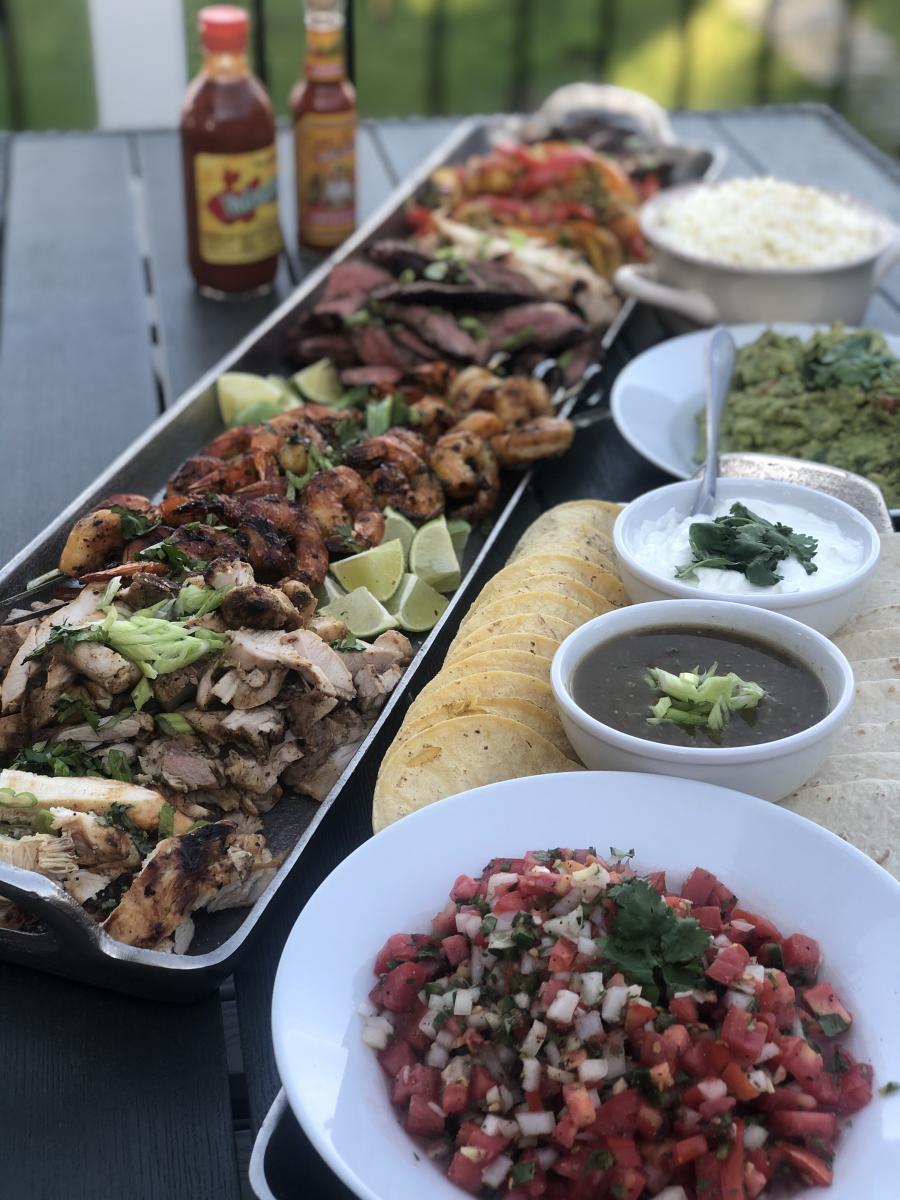
How to Cook (Flank) Steak for Fajitas
Flank Steaks are an extremely popular choice for fajitas, and for good reason. They’re generally a less expensive cut, delicious, and simple to cook. This citrus marinated flank steak is easy to pull off and will wow your guests.
Ingredients
- 1.5 Cups of Mango Juice
- 1.5 Cups of Orange Juice
- 1/2 Cup of Extra Virgin Olive Oil
- 1 Tbsp. of Red Pepper Flakes
- 1 Tbsp. of Cumin
- 1/2 Cup of Unpacked Fresh Cilantro
- 1/4 Cup of Fresh Oregano
- 1 Jalapeno
- 2 Cloves of Garlic
- Fresh Lime Juice (one limes worth)
Procedure (2.5 Hours)
- Place all ingredients in mixing bowl and stir until they are well incorporated.
- Place your Flank Steak in a large Ziplock bag.
- Pour the marinade into the bag. TIP – Why so much citrus? The acidity helps break down the steak allowing all of the big flavors to enter the meat!
- Place your bag in the fridge.
- After an hour flip your bag over.
- Let the steak marinate for a minimum of two hours.
- Turn your grill on Medium High heat.
- After about two minutes rotate your steak 90 degrees. TIP – Why rotate? This is how to achieve the great grill marks you see from high end chefs!
- Flip after 3.5-4 minutes.
- Repeat the same steps on the opposite side.
- Pull the steak from the grill when you reach an internal temp of 125 degrees.
-
How to Make an All Purpose Steak Seasoning
We love this seasoning because of it’s simplicity. We believe with any great cut of meat you should only use seasoning that enhances the natural flavor of the steak instead of disguising it.
Ingredients
- 1 tbsp. Kosher Salt
- 1/2 tbsp. Black Pepper
- 4 Cloves of Garlic
- 1/2 Cup Unpacked Rosemary
Procedure (2 Minutes)
- Add your four ingredients to a coffee grinder. Grind for 30-45 seconds or until all of the ingredients are well incorporated. You’re looking for a homogenous mixture.
- Coat all sides of your steak with the seasoning.
Click Here for More Interesting Information on BBQ
-
How to Reverse Sear a Steak!
Reverse Searing a Steak is one of the most common ways to cook a steak, mostly because it’s so damn good and extremely simple!

1.) 48 Hour Dry Prime https://www.saddlebackbbq.com/how-dry-prime-your-steak
2.) Seasoning with Salt, Pepper, Garlic, and Rosemary
3.) Smoke at 250 degrees to an internal temp of 120 degrees
4.) Let it rest for 10 minutes
5.) Sear each side for 2 minutes
6.) Let it rest for 10 minutes
7.) Enjoy!
-
How to Make a Simple Chimichurri Sauce
Chimichurri is a great condiment that will pair perfectly with your favorite steak! It’s extremely quick and easy to make.

Ingredients
- 1/2 tsp. of Salt
- 1/2 tsp. of Sugar
- 2-3 Cloves of Garlic
- 1/2 Cup of Unpacked Dill
- 1 Cup of Unpacked Parsley
- 1/4 Cup Unpacked Mint
- 1/4 tsp. of Red Pepper Flakes
- Lemon Zest
- 1/4 Cup of extra virgin Olive Oil
Procedure (8 Minutes)
- Muddle the Cloves of Garlic with the Salt and Sugar. The salt and sugar will quickly break down the garlic. Hammer until it forms a coarse paste.
- Muddle the Dill, Mint, and Parsley
- Add the Red Pepper Flakes
- Add your Olive Oil
- Zest your preferred amount of lemon. Squeeze in the juice from the lemon.
- Stir well so all your ingredients are well incorporated.
- Enjoy!
Our preferred method of enjoying the sauce is to thinly spread it over your steak. It will give you a great fresh and citrus taste to your meal!
-
2020 Live Animal Auction
Thank you to our incredible community, we were able to raise over $5,000 to go towards purchasing animals. This meant we were able to buy more hogs than ever before. In the end, we bought the Supreme Grand Champion Hog for $14/lb, as well as 3 other hogs.


Because of your help, we put over $6,700 towards some incredible children’s college funds.
Earlier this year, 4H decided they would not be putting on the annual auction. This led to parents working with the Ingham County Fair Foundation to find a way to make it happen. The kids had worked too hard to not have the auction. When we arrived on Thursday we were shocked by the level of detail that went into keeping people safe.
The uncertainty didn’t keep other local businesses away. We saw Merindorf Meats, Darrells Market & Hardware, Graff Chevrolet Okemos, and more buying numerous animals. Make sure to thank them for their support next time you see them!
In our four years of attending the auction, this was the most unique and enjoyable. Thank you to everyone that made this happen. It’s incredible to see what a community with a common goal can accomplish.
Nobody is going to forget 2020.
THANK YOU! -
Why is Some Cooked Chicken Pink?
One of the most frequently asked questions about our food is, "Why is my chicken pink? Is it undercooked?"

It can be alarming if you've never had our smoked chicken to bite into it and find some pinkness, and for good reason, as we all know undercooked chicken can be extremely dangerous.
The pinkness comes from a protein called myoglobin found in the muscles of meat. The more myoglobin the more red the meat is. For example, there is a much higher amount of myoglobin in beef than there is in chicken.
When smoking our meats the food comes in contact with nitric oxide and carbon monoxide, this is what keeps the pink color in the chicken. Additionally, it's the same element of smoking that gives you the highly coveted "smoke ring" when cooking a brisket.
We are always sure to check the internal temperature of our chicken when smoking it, ensuring it's above 165 degrees.
-
How To Cook A Tri-Tip!
Tri-Tips are a great option because they’re extremely flavorful and only take about an hour to cook!

- The first thing we like to do is Dry Prime our beef, this will give you a much better end result, here’s a link with more information on how to Dry Prime and all of its advantages!
- Next you’ll want to do is remove the fat cap on top of the tri-tip, this is composed of a hard fat that won’t render well and will take away from the final product.
- For seasoning we like to use Saddleback’s Beef Rub, but you really can’t go wrong here, this is completely up to you. Just make sure to coat all sides of the meat!
- Set your smoker to 250 degrees, you’re looking for an internal temperature between 120-125 degrees. This will typically take about an hour.
- Let the Tri-Tip tip rest for 5-10 minutes.
- Enjoy!
Here is a quick video explaining our tips and tricks for cooking a Tri-Tip!
-
Best Ways to Eat a Tri-Tip
3 Different Ways to Utilize Your Tri-Tip

French Dip – Provolone and thin sliced Tri-Tip on a Hoagie. Put the cheese on the bottom to showcase the meat but it is in there. Add your favorite Horseradish Sauce, enjoy!
Italian Beef Sandwiches – Thinly shave your Tri-Tip. Finely mince your favorite Giardiniera, or make your own. Then place it on top of the sandwich. This was my favorite out of the three!
Philly Style – Saute bell peppers, use a few different colors, top with your favorite cheese sauce. Ours consisted of “Easy Melt” and cream of chicken. Again, time was an issue so I didn’t get crazy with that one. Tasted great!
All in all, the smoked tri-tip from Darrells Market & Hardware was a huge success. I’m confident I could have made 8 sandwiches out of the one tri tip to give you an idea of its yield.
-
How to Dry Prime Your Steak
Performing a Dry Prime when cooking a steak is a simple step that will lead to a much better end result!

Salting your meat before cooking does the opposite of what you might think. When you salt the steak, there is an electrical attraction between the salt and the water in the steak. The salt draws the water out of the steak, then dissolves the salt, after 20 minutes, the meat pulls the salty moisture back into the meat.
After 48 hours, the result is a dry outside which will create a great crust while maintaining a very moist inside.
IT’S EASY!
- Coat the entire steak with Kosher Salt.
- Let it sit unwrapped in the refrigerator for 48 hours.
- Cook!
Here’s a short video on how to Dry Prime a steak and what the advantages are!
-
4th of July Feast
For the 4th of July this year, we made a feast for the ages. Utilizing our pellet smoker for every aspect of the cook.

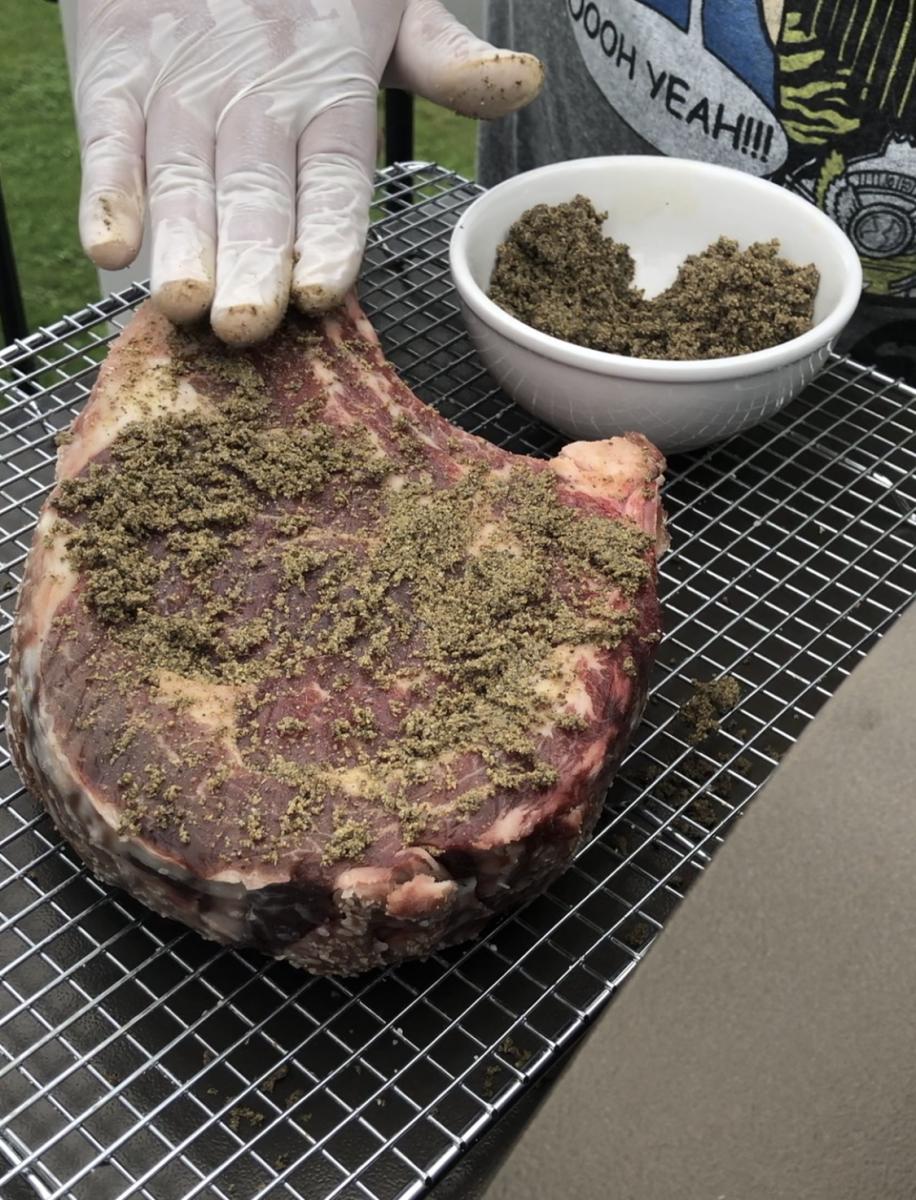
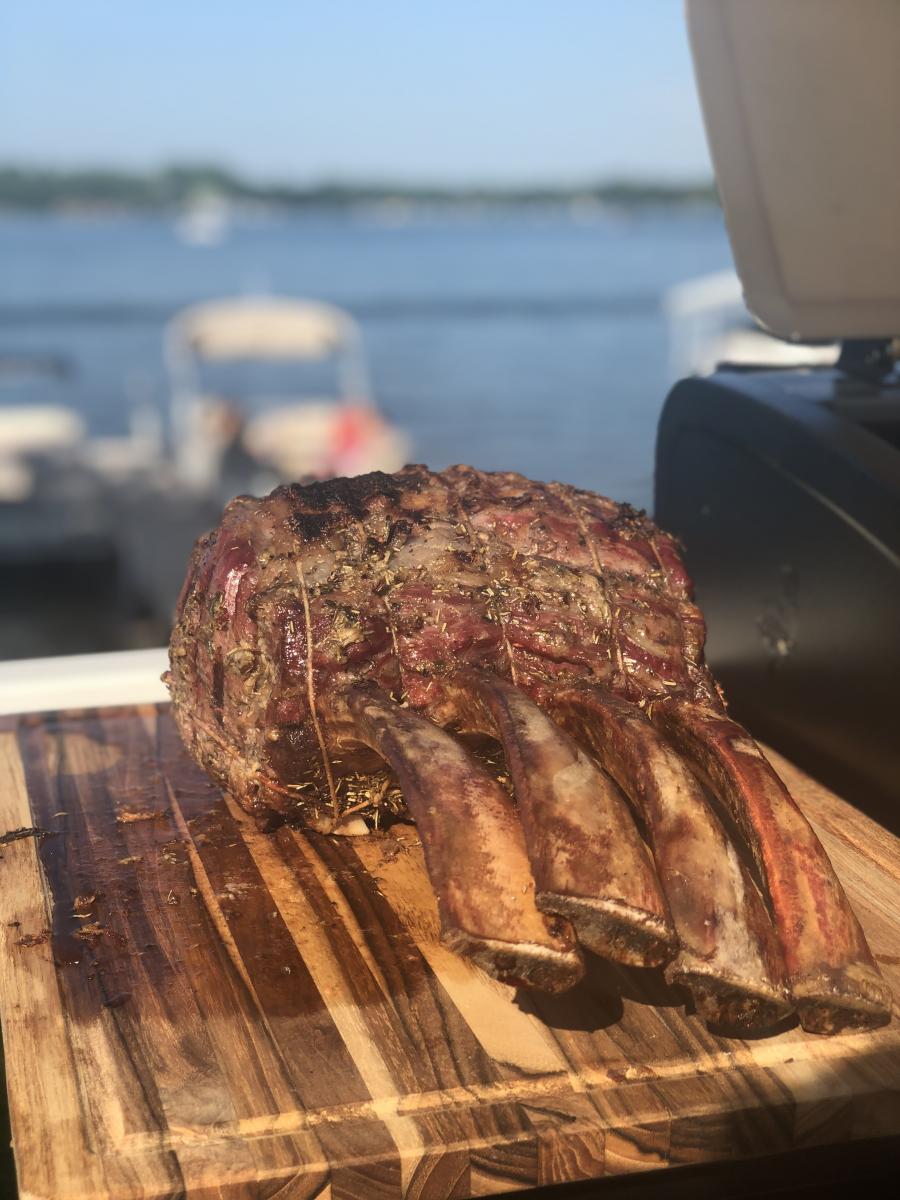
Our centerpiece was a Tomahawk Rib Roast smoked to perfection. The 10lb roast was seasoned with fresh rosemary, thyme, garlic, salt, and pepper. We smoked this with Smoke Ring’s Oak pellets for about 3 hours at 250 degrees, until it reached an internal temperature of 120 degrees. We then seared it on a piping hot grill to help give it a nice bark. This gave us the medium-rare cook we were looking for.
Seafood skewers consisted of half a lobster tail, scallops, shrimp, sweet corn, and lemon. We seasoned these with “Slap your mama” seasoning and brushed a compound butter on them throughout the cook. The compound butter was a blend of butter, green onions, Italian parsley salt, and pepper. We were looking for an internal temperature of 145 degrees, once we met our temperature we seared them on the hot grill.
Scalloped potatoes were cooked in the same smoker as the rib roast. These were russet potatoes, covered with a sauce consisting of cream of mushroom soup, heavy cream, asiago cheese, Cholula Hot Sauce, salt, pepper, and garlic.
The ladies made the strawberry rhubarb pie. They made a 3-2-1 dough (3 parts flour, 2 parts fat, 1 part water) the night before and put the pies together that day. They baked for 1 hour at 350 degrees on the Z Grill and turned out perfect


-
Meater+ Thermometers
Meater+ Bluetooth Thermometers
Saddleback recently started selling these thermometers! We choose to go with Meater for a few reasons. Bluetooth thermometers are quickly taking over in the world of thermometers. They’re easy to use, you can check the temp of whatever you’re cooking right from your phone, and they have specific settings for almost every meat you could think of.
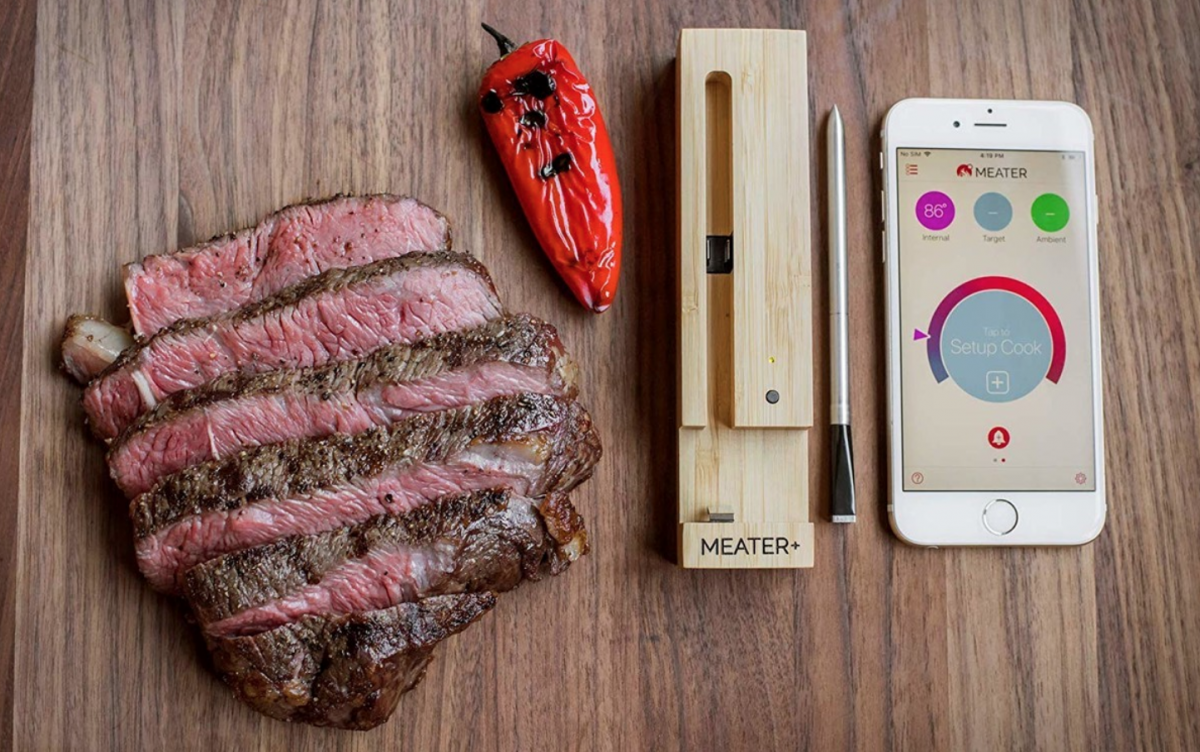
- 165ft of Range
- Easy Bluetooth Connection
- Internal Temp.
- Ambient Temp.
Frequently Asked Questions
Are my MEATER probes dishwasher safe?
Yes. We have been testing and have found no issues with durability or safety when it comes to putting your MEATER probes in a dishwasher.
We still recommend hand washing your probes to get rid of any stubborn debris.
Can MEATER function as a deep fry or candy thermometer?
MEATER should not be used as a deep fry or candy thermometer. This will damage the probe and void its warranty.
Should I be worried that my MEATER probe keeps disconnecting?
The MEATER probe uses Bluetooth to communicate to either your smart device, MEATER+ charger or MEATER Block.
With all wireless technology, but especially with Bluetooth, there are limitations on the range, especially if you are cooking with heavily insulated cooking appliances.
You should be able to get a minimum of 10ft from your probe in the open air, but certain smokers / grills and ovens (the thicker the material and the fewer gaps for the signal to escape) will cause range to decrease.
If you find that your MEATER probe is disconnecting, don’t worry, the MEATER app has been built to handle all types of disconnections, which means, when you do reconnect your cook will update, and carry on as normal.
Towards the end of your cook, we recommend keeping the connection active so you don’t miss any important notifications.
Why is my MEATER probe no longer connecting?
If you have used your MEATER Probe before, making sure the square metal end is clean is very important, as this is where the probe makes contact for charging.
Residue and grime from previous cooks may even look barely visible, which means that your probe may not have been charging since your last cook.
We recommend mixing some baking soda and vinegar on a sponge to give the ambient square end a good clean after every cook.
On the charging base itself, you could also see a build up of dirt or soot on the silver spring, which can impact the charger from properly connecting to the probe. It is advisable to give that silver spring a clean as well.
If you are still having trouble, we recommend restarting your mobile phone or tablet and making sure no other household devices are connected to your MEATER Probe.
Double check permissions:
iOS: From the Settings menu on your device, navigate to Privacy > Bluetooth and ensure that the toggle next to MEATER is switched on.
Android: From the Settings menu on your device, navigate to Apps > MEATER > Permissions and make sure that location permissions are enabled specifically for the app.
If you’re using a Samsung Galaxy device specifically, navigate to Settings > Biometrics and Security and check that Location/Find My Phone is turned on.
Why is my MEATER+ charger just flashing red when I take out the probe?
When your MEATER+ charger starts to blink red, it means that it has lost its Bluetooth connection to its probe.
Due to recent changes in the app, you might notice that when you remove your probe from the MEATER+ charger, it starts blinking red straight away, but appears as connected within the app itself.
Don’t worry, your MEATER+ is not broken. This just means that your probe found a stronger connection with your smart device. Once your smart device is no longer in range of the probe, your MEATER+ charger will automatically take the connection.
To avoid this, remove the probe from the MEATER+ charger before you open the app. This way it will blink green from the start.
Blinking red and not showing as online either way?
Your probe might not have charged properly. We recommend scrubbing the contact points before leaving in the charger to charge properly. You can find more information here.
-
4th of July Bundles
Saddleback BBQ is offering 4th of July Bundles! We’ve put together multiple packages that anyone interested in BBQ would be thrilled to receive!
Gold Package
- 1000c Z Grill Pellet Smoker – Saddleback Matt hand picked this smoker as the only one he would endorse. It’s a versatile, well built, & easy to use smoker that is an incredible value. Our goal is to introduce more people to the art of smoking meat. Giving a new meaning to backyard BBQ. This pellet smoker allows you to use all wood pellets to grill like you always have with a new smokey twist. It also has the flexibility for more traditional bbq, with foods like, brisket, baby back ribs, pork shoulders, and almost anything else you can imagine.
- Smoker Assembly
- Grill Cover
- Meater Bluetooth Thermometer – One of the coolest thermometers on the market. Just leave the probe in whatever you happen to be cooking and track the internal temperature on your phone. The simplest way to have a perfect cook every time ($100 value).
- Saddleback’s Pork Rub
- Saddleback’s Beef Rub
- 12oz Bottle of Sweet & Savory Sauce
- 12oz Bottle of Michigan Mustard
- $50 Saddleback Gift Card
- 40lb Bag of Smoke Ring Pellets (made in Boyne City, MI)
- 20lb Bag of Z Grills Pellets
- Free Delivery (within 10 miles)
Now $899, very limited availability!


Silver Package
- 1000c Z Grill Pellet Smoker – Same smoker as the Gold Package
- Grill Cover
- Grill Assembly
- 12 oz Bottle of Sweet & Savory
- 12 oz Bottle of Michigan Mustard
- Saddleback Pork Rub
- Saddleback Beef Rub
- 40lb Bag of Smoke Ring Pellets
- 20lb Bag of Z Grills Pellets
- Free Delivery (Within 10 Miles)
Now $799, limited availability!

Bronze Package
- 10002e Z Grill Pellet Smoker
- Grill Cover
- 12oz Bottle of Michigan Mustard
- 120z Bottle of Sweet & Savory
- Saddleback Pork Rub
- Saddleback Beef Rub
- 40lb Bag of Smoke Ring Pellets
- 20lb Bag of Z Grills Pellets
Now $639, limited availability!

*The Bronze Package does not include smoker assembly*
Pellet Bundle
- Sweet & Savory 12oz Bottle
- Michigan Mustard 12oz Bottle
- 1 Bag of Pork Rub
- 1 Bag of Beef Rub
- 1 40lb Bag of Smoke Ring Pellets (Made in Boyne, MI)
The perfect bundle for anyone that loves all things grilling and smoking.
Total retail value $49.95, only $39.95 for a limited time!
Gift Card Bundle
- Sweet & Savory 12oz Bottle
- Michigan Mustard 12oz Bottle
- 1 Bag of Pork Rub
- 1 Bag of Beef Rub
- $25 Gift Card
Total retail value $49.95, only $39.95 for a limited time!
If you have any questions about the bundles please email drew@saddlebackbbq.com!
- Previous page
- Page 16 of 20
- Next page