Blog
-
When Cooking a Brisket or a Pork Butt: To Spritz or Not To Spritz?
Spritzing is a technique used in BBQ that is said to help keep your meat moist. Typically it’s done using a spray bottle and some sort of liquid. It seems like apple cider vinegar is the most commonly used liquid, but I’ve also seen water, apple juice, and all sorts of crazy concoctions.
Many many many of the top bbq chefs in the world promote the spritzing method. They swear by it. Saying it does wonders to help keep the bark from overcooking, giving you a deeper smoke ring, and keeping the meat more moist.
At Saddleback we go with the less popular route, we choose not to spritz our briskets. After cooking thousands and thousands of briskets, we’ve tried all sorts of different methods. But when it comes to spritzing we have not noticed a difference in the end product that gives us any reason to believe it is better.
Of course, when it comes to these arguments, no opinion is a wrong opinion, this is just the route we’ve chose to go with. Perhaps in the future we’ll stumble on a new technique that calls for spritzing and it will be far superior. Until the day we are team no spritz.
Thoughts?
Click Here for More Interesting Information on BBQ
To support us, please consider ordering our BBQ Sauce!
https://www.amazon.com/dp/B082P7WZ99?ref=myi_title_dp
-
Which Side Should be up When Smoking a brisket?

This is an ongoing debate, and I don’t expect this will end it. At Saddleback we always cook our brisket fat side up.
This does a couple things. First from a practical stand point, when you cook a brisket fat side down it has a tendency to stick to the grates of your smoker, making it difficult to move.
Second, because the fat sticks to the grates it will ensure you will lose some of your hardly fought for bark.
BUT – we use an offset smoker, the smoke from our wood needs to travel a long distance before hitting our brisket. This is a very indirect feat source. If you use a cooking method that has a more direct flame on the meat you may want to consider going fat side down. The thick layer of fat will help protect the meat from the heat.
As always with BBQ experimentation is always the best part because at the end of the day you get to eat some really great food.
We’d love to hear which method you prefer and why!
Click Here for More Interesting Information on BBQ
-
How to tell if your Pork Butt is done
As is often the case with BBQ, when smoking a pork butt the thermometer should be one tool that you use, but is not the be all and end all.
At Saddleback we like going by “feel” to be our final determining factor. You want the shoulder to feel “loose”. It should have a good amount of jiggle to it when touching it. When inserting your thermometer if it goes in with almost no effort, you know you’re getting close.
We typically smoke our shoulders around 250 degrees for 6-10 hours. We are looking for an internal temperature between 195-205. We know a shoulder is ready to come off when you can easily pull the bone out.
Click Here for More Interesting Information on BBQ
-
How to Make a Mushroom Duxelle - Perfect for a Beef Wellington!
Mushroom Duxelles are delicious, they pair perfectly with the tenderloin in a beef Wellington, and the best part, they’re extremely easy to make!

Ingredients
- 1/2lb of Button Mushrooms
- 1/2lb of Baby Portobello Mushrooms
- 1 Shallot
- 1 Red Onion
- 1 clove of Garlic
- 1tsp. Salt
- 1tsp. of Pepper
- 2 Sticks Thyme
Procedure
- Add all ingredients in a food processor.
- Blitz it up!
- Use the food processor until all ingredients are well broken down – you’re looking for a brown paste like substance.
- Cook in a hot pan (about 6 minutes) – The reason you cook it is to release all the moisture, this adds to the flavir and keeps your Wellington crisp!
- Add your favorite Cognac and cook for an additional two minutes.
- Let it chill.
To see how to use your duxelle in a Wellington click here!
-
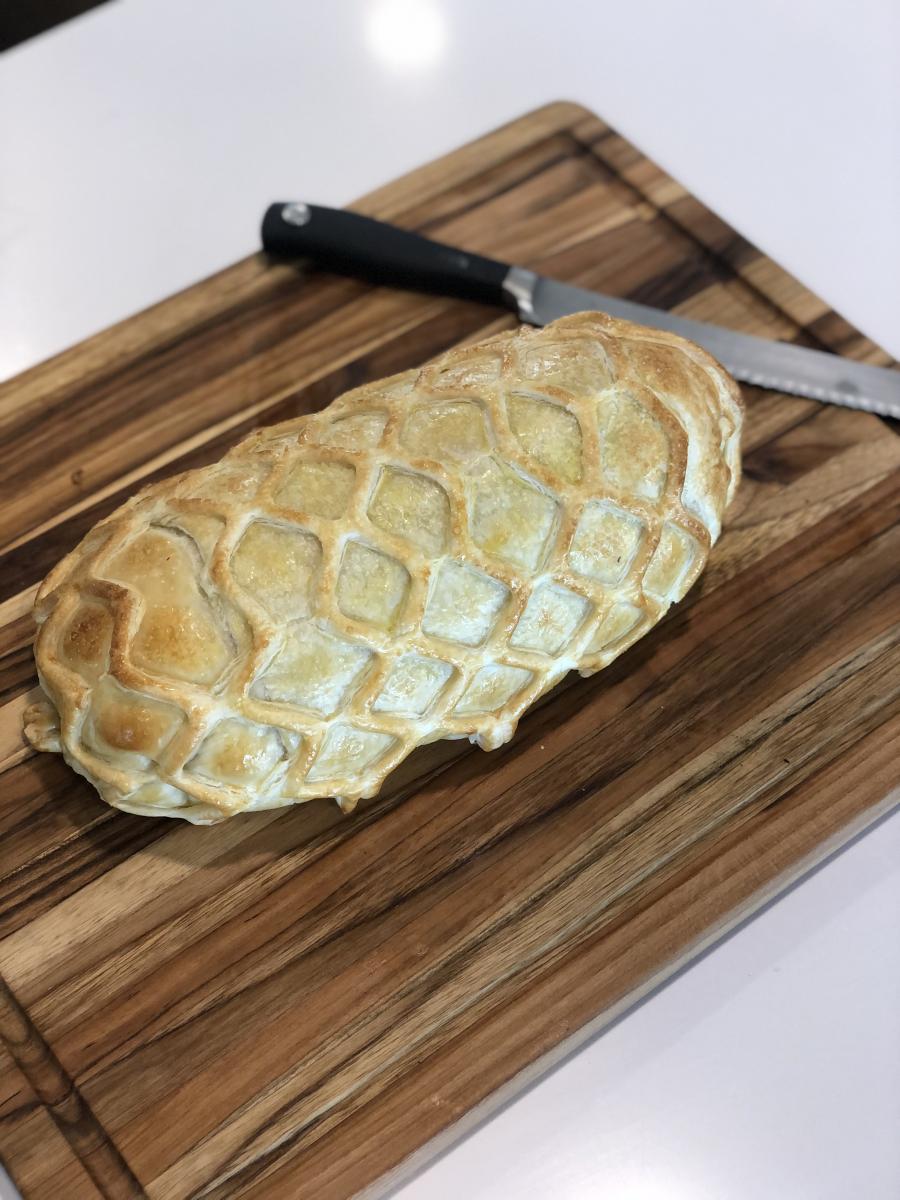
Can you Make a Beef Wellington on a Smoker?
Smoked Beef Wellington? Absolutely, it’s our favorite way to do it! It’s not a difficult as it looks, below we break down every step in detail. Good luck!
Ingredients & equipment
- Whole beef tenderloin
- Dijon Mustard – Enough to spread over the entirety of the meat
- Prosciutto – one standard pack
- 2 Puff pastries
- 4 crepes
- Plastic wrap
- 3 eggs
- Olive oil
- food processor
- Salt
- Pepper
- Garlic
Instructions
- Season your tenderloin with salt, pepper, and garlic, making sure to cover all sides of the meat.
- Turn your stove to medium high heat, coat the bottom of the pan with Olive oil, quickly sear all sides.
- Smoke at 300 degrees until the internal temperature reaches 125 degrees.
- Brush all sides of the filet with Dijon Mustard.
- Lay your crepes down, layer the prosciutto over the crepes.
- Season with black pepper.
- Generously spread the mushroom duxelle over the prosciutto.
- Lay plastic wrap under your crepes. Place your tenderloin on the edge of the crepes. Use the plastic warp to roll the crepes around the meat. Make sure it’s as tight as possible.
- Place in fridge for 30 minutes.
- Brush your puff pastry with egg yolk.
- Repeat step 8 with the puff pastry.
- Place in fridge for 30 minutes.
- Add a latice over the pastry to enhance the look!
- Brush with egg yolk and season the outside with salt. This will help the pastry crisp.
- Place in your smoker at 400 degrees for 20 minutes.
- Let it rest for 10-15 minutes.
- Enjoy!
-
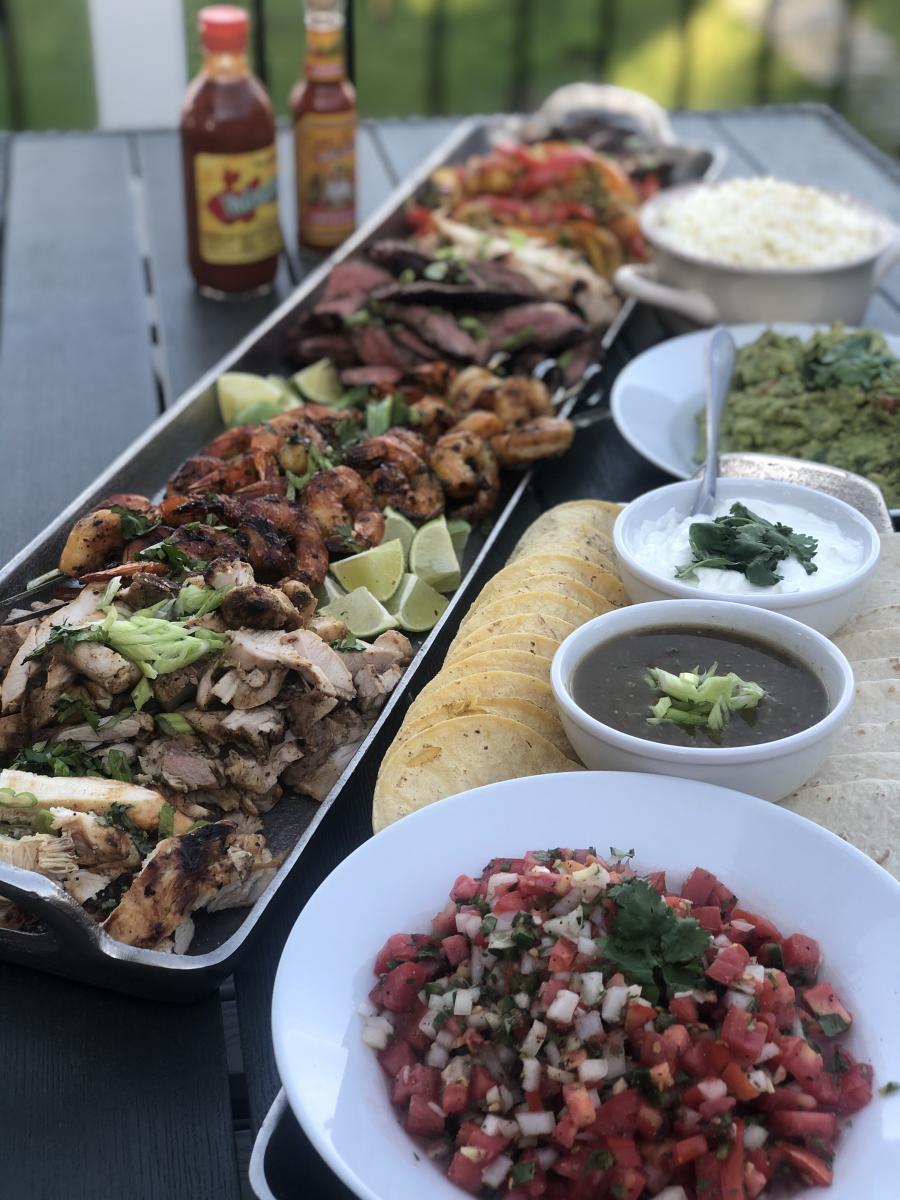
How to Grill Shrimp for Fajitas
Seafood can always be a little tricky to pull off perfectly. Here we go over a simple recipe for great shrimp, and perfect for fajitas!

Ingredients (Initial Marinade)
- 1 Cup of Olive Oil
- 2 tsp. of Salt
- 2 tsp. of Pepper
- 2 tsp. of Red Pepper
- 2 Cloves of Garlic Finely Diced Garlic
- 2 lbs of raw jumbo shrimp
Ingredients (Agave Butter)
- Whole Stick of Butter
- 2 Cloves of Finely Diced Garlic
- 1/3 Cup of Cilantro
- 1 Tbsp. of Agave Nectar
- Two Shots of Mescal
Instructions
SHRIMP
- Take the ingredients for the marinade and pour them into a large bowl with your shrimp.
- Mix the ingredients until the shrimp are completely covered.
- Place the shrimp on skewers. TIP: place the skewer through the head and tail!
MESCAL AGAVE BUTTER
- Place the whole stick of butter in a warm sauce pan. Let it melt.
- Add your garlic, cilantro, agave nectar, and mescal.
- Let it simmer until about 1/4 of the solution dissipates (about 15 minutes)
COOKING THE SHRIMP
- Turn your grill on medium high heat.
- Once your grill is up to heat place your shrimp skewers on the grill.
- Brush your mescal agave butter on the shrimp.
- Flip your shrimp after about 3 minutes.
- Brush your butter on the other side of the shrimp.
- Grill for another 3 minutes.
-
How to Cook (Flank) Steak for Fajitas
Flank Steaks are an extremely popular choice for fajitas, and for good reason. They’re generally a less expensive cut, delicious, and simple to cook. This citrus marinated flank steak is easy to pull off and will wow your guests.
Ingredients
- 1.5 Cups of Mango Juice
- 1.5 Cups of Orange Juice
- 1/2 Cup of Extra Virgin Olive Oil
- 1 Tbsp. of Red Pepper Flakes
- 1 Tbsp. of Cumin
- 1/2 Cup of Unpacked Fresh Cilantro
- 1/4 Cup of Fresh Oregano
- 1 Jalapeno
- 2 Cloves of Garlic
- Fresh Lime Juice (one limes worth)
Procedure (2.5 Hours)
- Place all ingredients in mixing bowl and stir until they are well incorporated.
- Place your Flank Steak in a large Ziplock bag.
- Pour the marinade into the bag. TIP – Why so much citrus? The acidity helps break down the steak allowing all of the big flavors to enter the meat!
- Place your bag in the fridge.
- After an hour flip your bag over.
- Let the steak marinate for a minimum of two hours.
- Turn your grill on Medium High heat.
- After about two minutes rotate your steak 90 degrees. TIP – Why rotate? This is how to achieve the great grill marks you see from high end chefs!
- Flip after 3.5-4 minutes.
- Repeat the same steps on the opposite side.
- Pull the steak from the grill when you reach an internal temp of 125 degrees.
-
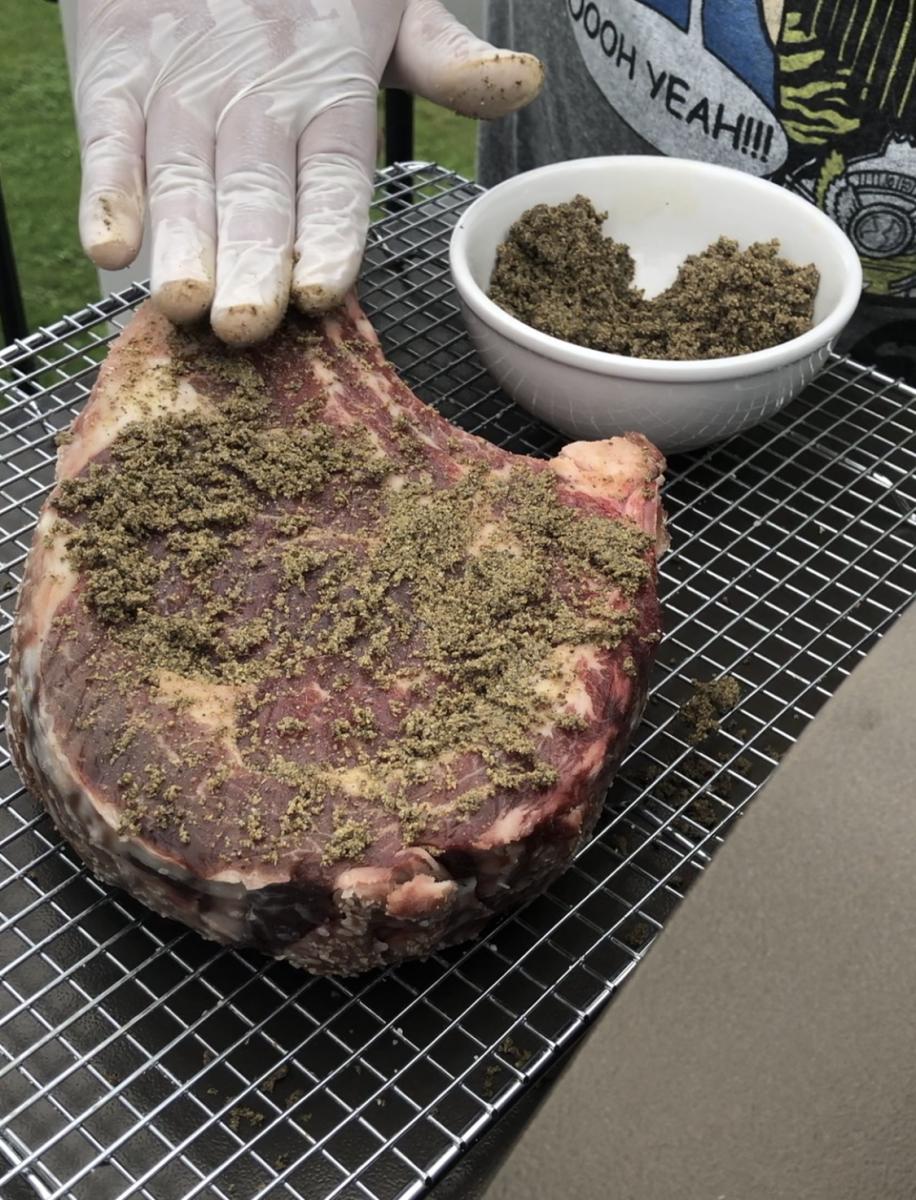
How to Make an All Purpose Steak Seasoning
We love this seasoning because of it’s simplicity. We believe with any great cut of meat you should only use seasoning that enhances the natural flavor of the steak instead of disguising it.
Ingredients
- 1 tbsp. Kosher Salt
- 1/2 tbsp. Black Pepper
- 4 Cloves of Garlic
- 1/2 Cup Unpacked Rosemary
Procedure (2 Minutes)
- Add your four ingredients to a coffee grinder. Grind for 30-45 seconds or until all of the ingredients are well incorporated. You’re looking for a homogenous mixture.
- Coat all sides of your steak with the seasoning.
Click Here for More Interesting Information on BBQ
-
How to Reverse Sear a Steak!
Reverse Searing a Steak is one of the most common ways to cook a steak, mostly because it’s so damn good and extremely simple!

1.) 48 Hour Dry Prime https://www.saddlebackbbq.com/how-dry-prime-your-steak
2.) Seasoning with Salt, Pepper, Garlic, and Rosemary
3.) Smoke at 250 degrees to an internal temp of 120 degrees
4.) Let it rest for 10 minutes
5.) Sear each side for 2 minutes
6.) Let it rest for 10 minutes
7.) Enjoy!
-
How to Make a Simple Chimichurri Sauce
Chimichurri is a great condiment that will pair perfectly with your favorite steak! It’s extremely quick and easy to make.

Ingredients
- 1/2 tsp. of Salt
- 1/2 tsp. of Sugar
- 2-3 Cloves of Garlic
- 1/2 Cup of Unpacked Dill
- 1 Cup of Unpacked Parsley
- 1/4 Cup Unpacked Mint
- 1/4 tsp. of Red Pepper Flakes
- Lemon Zest
- 1/4 Cup of extra virgin Olive Oil
Procedure (8 Minutes)
- Muddle the Cloves of Garlic with the Salt and Sugar. The salt and sugar will quickly break down the garlic. Hammer until it forms a coarse paste.
- Muddle the Dill, Mint, and Parsley
- Add the Red Pepper Flakes
- Add your Olive Oil
- Zest your preferred amount of lemon. Squeeze in the juice from the lemon.
- Stir well so all your ingredients are well incorporated.
- Enjoy!
Our preferred method of enjoying the sauce is to thinly spread it over your steak. It will give you a great fresh and citrus taste to your meal!
-
Why is Some Cooked Chicken Pink?
One of the most frequently asked questions about our food is, "Why is my chicken pink? Is it undercooked?"

It can be alarming if you've never had our smoked chicken to bite into it and find some pinkness, and for good reason, as we all know undercooked chicken can be extremely dangerous.
The pinkness comes from a protein called myoglobin found in the muscles of meat. The more myoglobin the more red the meat is. For example, there is a much higher amount of myoglobin in beef than there is in chicken.
When smoking our meats the food comes in contact with nitric oxide and carbon monoxide, this is what keeps the pink color in the chicken. Additionally, it's the same element of smoking that gives you the highly coveted "smoke ring" when cooking a brisket.
We are always sure to check the internal temperature of our chicken when smoking it, ensuring it's above 165 degrees.
-
How To Cook A Tri-Tip!
Tri-Tips are a great option because they’re extremely flavorful and only take about an hour to cook!

- The first thing we like to do is Dry Prime our beef, this will give you a much better end result, here’s a link with more information on how to Dry Prime and all of its advantages!
- Next you’ll want to do is remove the fat cap on top of the tri-tip, this is composed of a hard fat that won’t render well and will take away from the final product.
- For seasoning we like to use Saddleback’s Beef Rub, but you really can’t go wrong here, this is completely up to you. Just make sure to coat all sides of the meat!
- Set your smoker to 250 degrees, you’re looking for an internal temperature between 120-125 degrees. This will typically take about an hour.
- Let the Tri-Tip tip rest for 5-10 minutes.
- Enjoy!
Here is a quick video explaining our tips and tricks for cooking a Tri-Tip!
- Previous page
- Page 5 of 8
- Next page